Showing posts with label before and after. Show all posts

Monday, May 27, 2013

Entertainment Center Before & After


Happy Memorial Day! We have been working a lot in the yard this weekend and are getting closer to finishing up the sprinklers in our front yard flower beds! (I’m pretty sure that was supposed to be my Mother’s day present at least one of the 6 years we have lived here … ha!) We have also been having fun spending time with family, going out to eat, and having a campfire (smores … yum!) in the backyard. The weather has been perfect and we are really just soaking it all up!


I also finished up this gem that I have been slowly working on for the past year! Remember way back in March of 2012 my mom and I started redoing her house?? Well, we found what we think was an old shoe shiners bench during our all day thrifting marathon and picked it up with the intent of turning into their new entertainment center.


I am beyond giddy with the results and am kind of wishing it was mine!

100_1044


Just to refresh your memory, this is how she looked when we picked it up back in March 2012. Pretty, right?!

DSC02840


Then it sat … for months, until we decided to get working. We removed the old top and added some pine 1 x 2’s to beef it up and get it ready for a new top. I swear the kids love helping!

IMG_20130107_175226


Before adding the new top I did a few alternating layers of a white and gray wash on the base. (Sorry, I didn’t get any pics!)

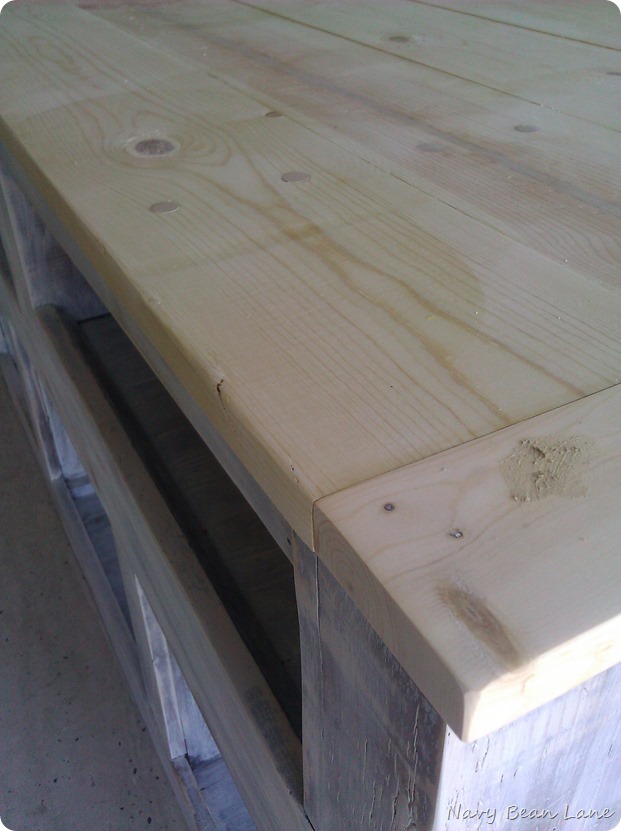
Once the painting was done we added the top which was just pine 1X5’s capped on each end with a 1X3. To hide the screws we countersunk them and then added 1/2” wood plugs. I love the extra bit of character that they add!
IMG_20130504_122932


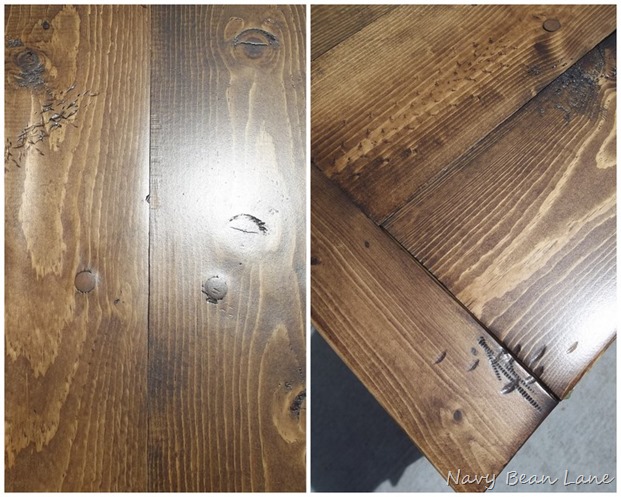
We found that even after choosing the straightest boards we could find, the top was still going to need some major sanding to smooth it all out. Thank goodness for electric sanders! I sanded the crap out of that thing until it was smooooth and then it was time for a little distressing! I just used whatever I could find around the garage; a hammer (both sides), a screw, a drill bit.

IMG_20130504_123148


After sanding, distressing, and staining, this is what the top looked like.
2011-01-16 013


Once the top was on and stained I felt like the base needed a little more character, so I took the electric sander to it and exposed a little of the wood underneath the white wash.

Here is is after sanding.

100_1029


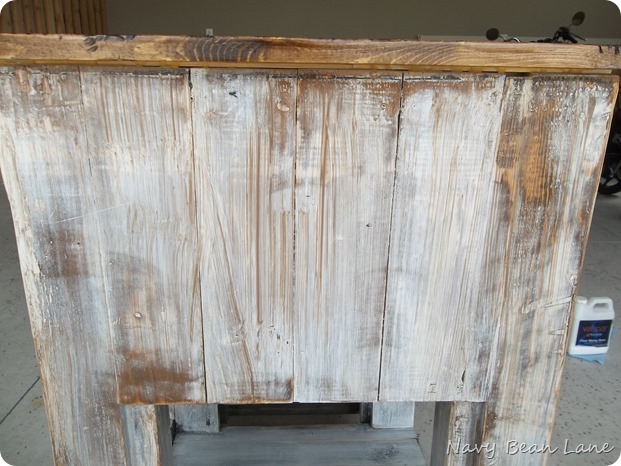
Then I mixed up a glaze and applied it with a cheapo brush.

100_1033


Here is how it looked with the stain/glaze brushed on.
100_1030


And then after wiping it back off. It’s not a huge difference, but it just adds one more layer and a little more depth.

100_1032


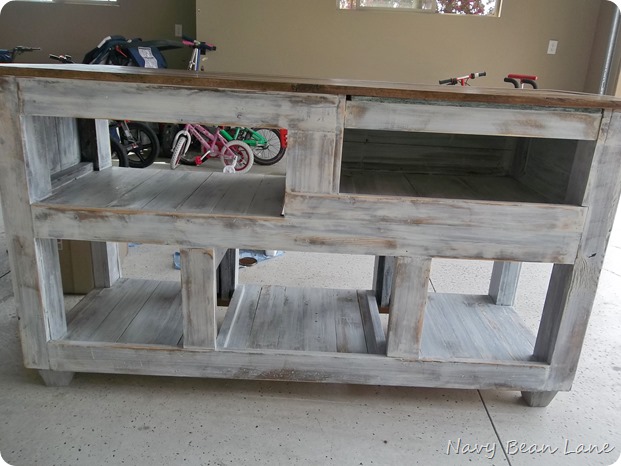
Here is the whole thing after sanding (but before glazing) and adding some new feet. After this step we added a small piece of trim right under the new top to cover a few gaps and finish off the look.
100_1028


The final step was to seal it. We used Varathane polyurethane in a satin finish.

100_1042


And just because I can’t get enough … here are a few more shots of the finished product!

100_1044


100_1050


100_1049


100_1052


100_1057


100_1047


Now I’m off to enjoy what’s left of this glorious, long Memorial weekend! I hope you are too!


Kristin


Linked up here:
Lolly Jane(The Scoop), My Uncommon Slice of Suburbia, Not Just a Housewife, Thrifty Décor Chick

Wednesday, March 20, 2013

Butcher Block Island Before & After


I redid this butcher block island for a client and am giddy with the results!

The before …

100_0701


And after! (A little styling never hurts either, right!?)

100_0969


For the top I wanted a hand rubbed finish opposed to a manufactured finish so I decided to give Tung Oil a go. Have you used it? This was my first time and most definitely won’t be my last. I LOVE how it turned out, and after five coats it’s got to stand up to wear and tear!

100_0971


100_0974


100_0970


The Process

Prep – Clean and sand

Prime – Zinsser Oil Base

Paint – Benjamin Moore Aura (White Dove),

then Poly with Varathane brand in Satin

Top – Sanded and then stained with 2 coats of Minwax (Dark Walnut)

and finished off with 5 coats of Tung Oil


I don’t know if it’s just the warm up in the temps or what but I have got the itch. (Not that itch … ha ha ) The furniture redo itch! I have bought a few things to refinish this week and will be posting on Facebook anything that’s up for grabs so be sure to follow along!


Thanks for reading!

Kristin


Linked up here:
Osie Moats, Somewhat Simple, Tatertots & Jello, Six Sisters Stuff, Lolly Jane (The Scoop), Not Just a Housewife, Savvy Southern Style,House of Smiths

Friday, February 1, 2013

Black Bathroom & Laundry Room Cabinets Before & After


How’s everyone’s week going? We are looking forward to the weekend here! Saturday will be filled with indoor soccer games which the boys are dyeing to play in since they had to miss the last couple weeks when they were sick. And yes, I am that mom that never thought she would yell and scream at the games … but I totally do!

Today I wanted to show you the rest of my Brother and Sis in Laws cabinets that we repainted. We did their kitchen cabinets in a nice warm gray (check them out here) and the rest of the cabinets in their house black.

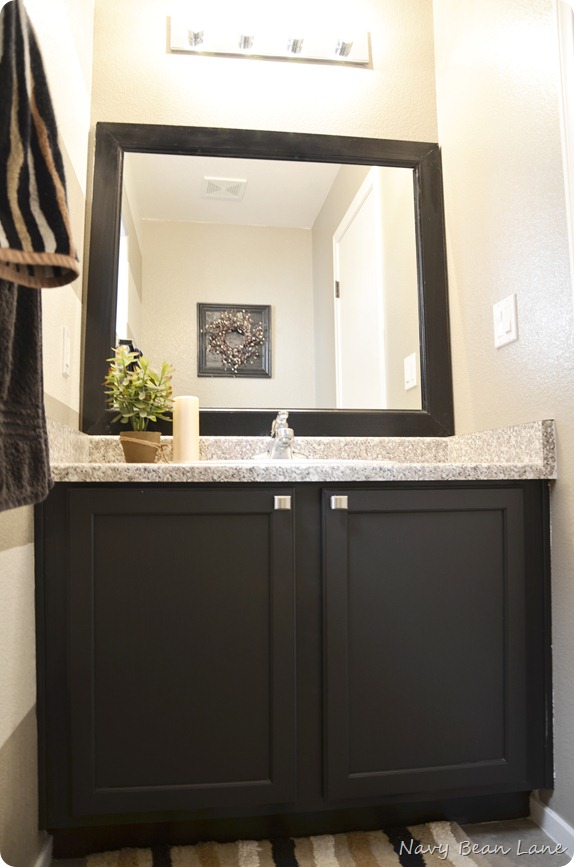
Here is the half bath. I love how they turned out. We used a semi gloss poly on all the cabinets so they would be cleanable but not in your face shiny.

Doyle_11


I love the casual style of their home. If you remember their kitchen, it also has a striped wall like this one in the bathroom and I think it keeps the house feeling cohesive. Plus, I’m just a big fan of fat horizontal stripes!

Doyle_10


Doyle_9


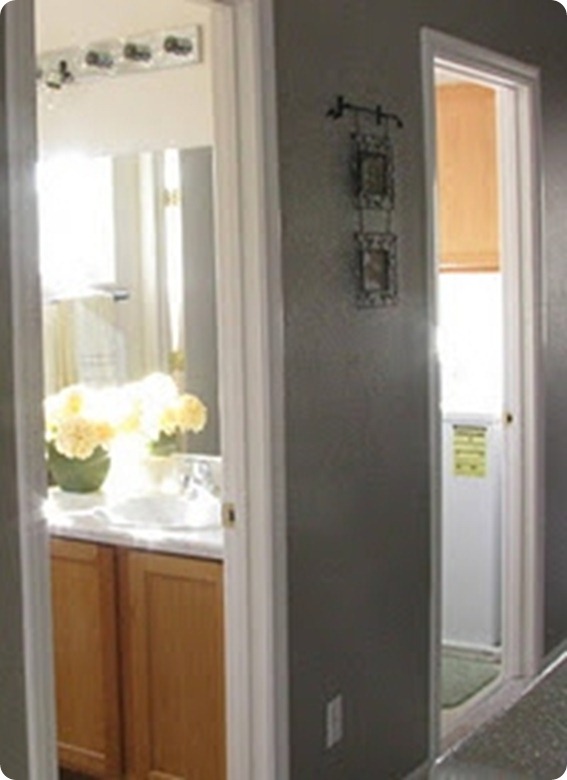
Just to give you a tiny idea of what the cabinets looked like before, here is a shot peeking into the full bathroom and the laundry room.

main bath and laundry before


Here is the laundry room now. Super clean and simple. Anna DIYed the baskets on the top of the cabinets out of diaper boxes. Aren’t they perfect?!

Doyle_12


The hardware is the same as what she put in the kitchen, with a different finish. Again, keeping with the flow of their home.

Doyle_13


And the full bathroom that is next to the laundry room …

Doyle_14


Those stripes again … LOVE!

Doyle_15


Here’s a super grainy shot of the Master Bath before. (It’s all she had … but makes for a great before & after!)

master bath


Doesn’t the after look amazing?? I love that they added a chunky black frame around the mirror. It really completes the room.

Doyle_16


So, there you have it! I am in love with all the cabinets and am always amazed at the huge difference paint can make in your home! Oh, and once again the awesome photography was done by my Sis in laws friend Tosha. Go check her stuff out here!


The Process

Clean, Sand, then Wipe with Liquid Deglosser

Prime – Zinsser Oil Based

Paint – Black Magic in Satin by Olympic

Top Coat – Poly by Varathane in Semi Gloss


Have a fabulous weekend!

Kristin


Linked up at:
Tatertots & Jello
Savvy Southern Style
Somewhat Simple
Not Just a Housewife
Savvy Southern Style
Thrifty Decor Chick
The Scoop @ Lolly Jane, East Coast Creative


Monday, January 14, 2013

Gray Kitchen Cabinets Before & After


I can’t even contain how excited I am to finally show you my Brother and Sis in Laws kitchen cabinets that we did way back in … wait for it … October!!! I know I know, better late than never, right?

Instead of boring you with the whole background story on their kitchen, let’s just get straight to the good part; the pictures of coarse!

Here’s how they looked before. Nothing fancy. They were builder grade cabinets that had very little personality, which is sooo not my brother and sil. They are so fun, hip and full of personality and their kitchen was begging to feel more like them!


IMG_3975


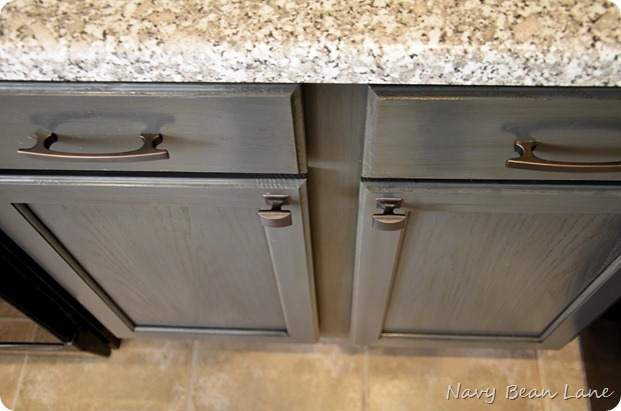
And the after! I love that they were brave and did something other than the standard white or black “comfort zone” colors. The gray (Nights Armor by Olympic) completely updates the space and gives off a surprisingly warm, inviting vibe.

Doyle_2


Doyle_4


We did a light glaze over the gray that you can see best in this picture. Anna was worried about blending the gray color in with their brownish toned countertops and floors and the glaze did the trick. It all flows perfectly!

Doyle_7


Doyle_8


Doyle_1


Doyle_6


Are you loving the gray as much as I am?? We also did their laundry room and bathroom cabinets in black … I’ll show you those soon!

Since my brother and sis in law live in Vegas I couldn’t do the after pictures so they had their very talented friend Tosha take them. If you live in the Vegas area and need pictures done she does an amazing job! You can check out her facebook page here.


Happy Monday!


Kristin


Linked up at:
Savvy Southern Style
Somewhat Simple
tatertots & jello
Thrifty Decor Chick
Not Just a Housewife
EC2

Tuesday, October 2, 2012

Dining Table Facelift


This, my friends is a very sad dining table. It has been through a lot in it’s lifetime and in doing so has given me many cherished childhood memories. Yep, you guessed it! It’s my parents dining table and the one I grew up eating breakfast, lunch and dinner at, doing homework and crafts at, crying at and laughing at. As you can see it has been well used and well loved, and was in desperate need of a facelift.

DSC02552


The bones of the chairs were in a little better condition … but still not great! (The cushions, not so much!!!)

DSC02553


I actually did this project awhile ago. It was one of my firsts attempts at a big project and for sure my first try at doing a burn through to distress it. I think it turned out pretty good and is a huge improvement over what it was before!

100_0497


100_0500


100_0501


100_0507


100_0502

I love trying new things and have learned that the only way to know what I like best and what looks best is by trial and error. I can’t wait to try this technique on another piece of furniture!

Have you tried any new techniques lately? Had success … or even a fail? I would love to hear!


Linking up to:
Savvy Southern Style
Thrifty Decor Chick


Monday, September 17, 2012

Entry Table Before & After


I can’t even contain how excited I am to show you my latest project! It is by far my favorite of anything I have done yet!!!

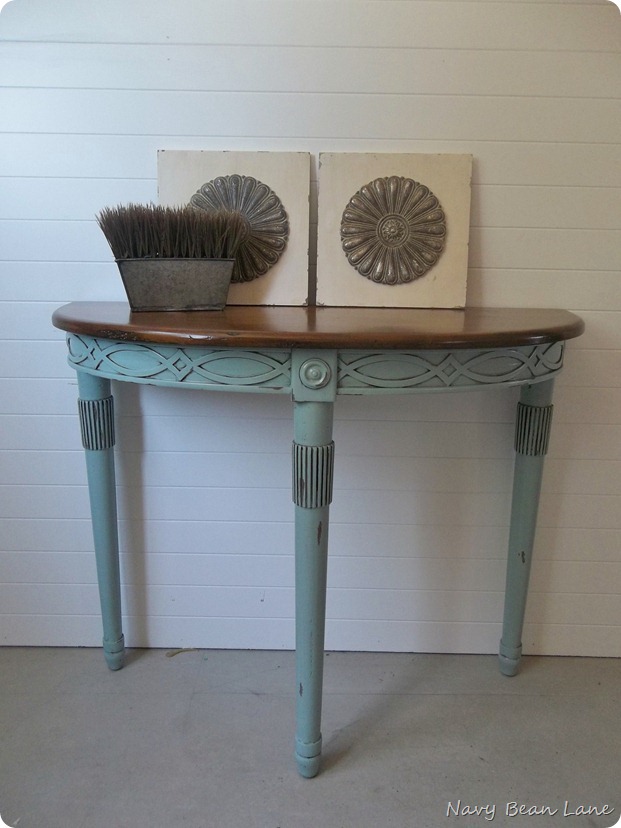
It’s an entry table that I redid for my bff from high school for her wedding present. She is absolutely one of the most strong, wonderful, amazing girls I have ever met … one day I will tell you about her amazing story. Anyway, I just love her and was so excited to do something fun for her home. She already had the table, and when she showed it to me I instantly fell in love with the detail and knew it was going to be amazing!

Here’s how it looked before I got my hands on it!

IMG_20120904_114600


And here it is after! LOVE LOVE LOVE!

100_0550


100_0556


100_0560


100_0562


100_0557


100_0551


2012-09-16 001


Mmm, K. I’m thinking Tropical Bay by Valspar is my new favorite color. Not too bright, not too gray … it’s perfect, don’t ya think? I will definitely be using it again in the future.


The Process 

Primer Valspar (tinted a medium brown)

Paint  Valspar Tropical Bay

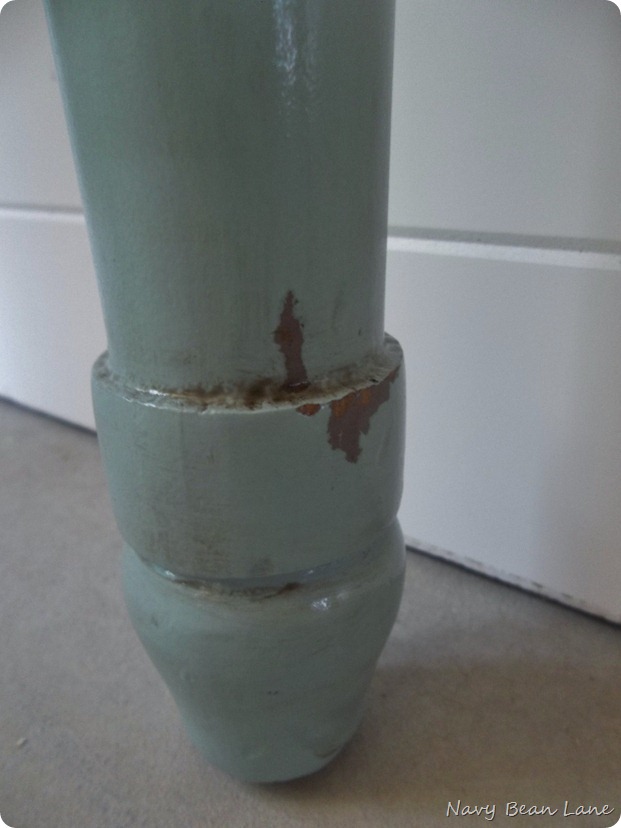
Distressed with razor blade

Glaze Custom mixed with stain and clear mixing glaze

Stain Rust – oleum (Kona)

Top Coat Poly by Varathane in semi gloss


Thanks for stopping by and checking out my stuff! I can’t wait to show you some shots of Mandee’s wedding later this week. I got to help decorate and it turned out amazing!

Linking up with
Thrifty Decor Chick
Beneath My Heart
Savvy Southern Style