Friday, March 8, 2013

Baby Doll Bunk Bed


If you follow along on Instagram or Facebook you may have seen a sneak peek or two at the doll bunk beds that we made for Navi’s birthday. (follow along on Instagram! @navybeanlane for random updates and sneak peeks of my latest projects!) And when I say we, it was a total collaboration with Kasey’s Grandpa building them, Kasey painting them, and me sewing all the bedding.

I am so so happy with the outcome!

 100_0955


We decided to go with Benjamin Moore White Dove for the paint, 1- because we had extra from a previous cabinet job (can’t  beat free paint!), and 2- because I wanted it to go with whatever changes happen in her room over the years so white was the natural choice.


100_0957


The bedding was made out of Navi’s old receiving blankets and the fabric for the pillows was cut from her old crib sheet. I love how it gives another life to her baby linens and also ties into her room perfectly!


100_0958


I absolutely love the sentimental meaning in that Navi used to sleep on the very sheet that her babies now do! Gah! I just want to eat her up … why oh why do they have to grow up?


IMG_6096


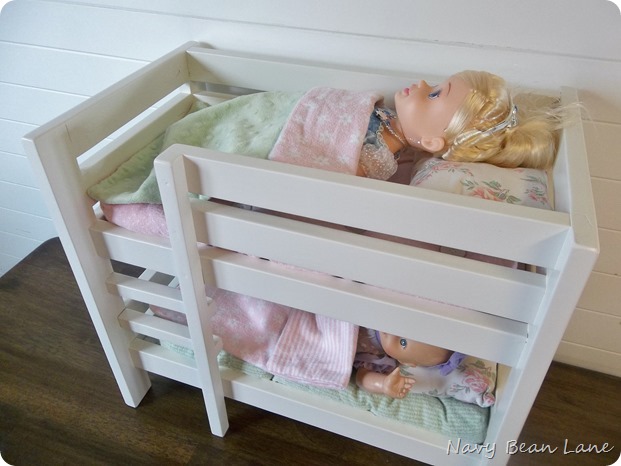
Back to the bunk bed … I got the plans from Ana White. Have you checked out her site? She is AMAZING! The bed is made to fit an American Girl doll, so it’s a pretty good size. Often times Navi will double or triple them up and have 4-6 doll sleeping comfortably! :) There is also a tutorial on her sight for the bedding and pillows. Don’t be scared to make it … if I can do it, then trust me so can you!
 

100_0962


Navi loves to give her babies kisses and tuck them into their new beds and I love watching her be a little mama! Really, how is she this big!?!


100_0966


Anyone doing any DIY this weekend? I will be working on wrapping up a couple of projects for Mason’s room that I can’t wait to show you next week! (And yes, I’m aware that my goal was to be DONE by the first of March … for some reason or another things always seem to take longer than I expect around here! Oh well, such is life!)

Kristin


Linked Up At:
Sassy Little Lady,Tatertots & Jello, Six Sisters Stuff, Not Just a Housewife, Lolly Jane (The Scoop), Savvy Southern Style, Somewhat Simple

Monday, March 4, 2013

Updates


Wow! The weekend went be sooo fast! We didn’t do a ton, just piddled around working on a few random projects, but it was so nice to have Kasey home ALL weekend (that rarely happens!) with nothing that had to be done! I love those kind of weekends!

I did work on the blog a bit. Did you notice? I had been wanting to clean up my sidebar a bit and add a few social media buttons. I will just say that I probably spent 3-4 hours working on them, and still have not been able to get the email button to work Sad smile. (Dad, you may be getting a phone call soon …) I have never claimed to be very techy … it’s just not me. So I’m happy that I actually figured out how to do a few new things (thanks to Google and all the awesome tutorials out there).

I am always looking for ways to improve this little blog and may one day have to hire someone, but for now I am liking the updates!

Thanks to all the readers that take time to, well … read! I really do appreciate it and love love love reading and responding to your comments! Don’t hesitate to connect with me through Facebook and Pinterest too! And if you aren’t a follower yet, I would love for you to become one! (Just click on the button on my sidebar that says join this site)

Have a great week!

Kristin

Tuesday, February 26, 2013

Princess Cake Skirt {Tutorial}

I had so much fun making Navi’s princess cake that I thought I would share a simple tutorial on how to do it! The best thing about this cake is that it’s super quick and easy and can be customized to go with your party!

The cake part was my twist on a cake a found on Pinterest. Bird on a Cake gives a great tutorial on how to make the frosting “petals”. It’s actually a lot easier than it looks! Give it a try! Her cake was all white, but I wanted Navi’s to be pink (per her request) and decided on a whim to add the yellow in for a little more interest.

I also saw a “tulle cake stand” on Pinterest here. I fell in love and knew it would be perfect for Navi’s princess cake! 


100_0915-001


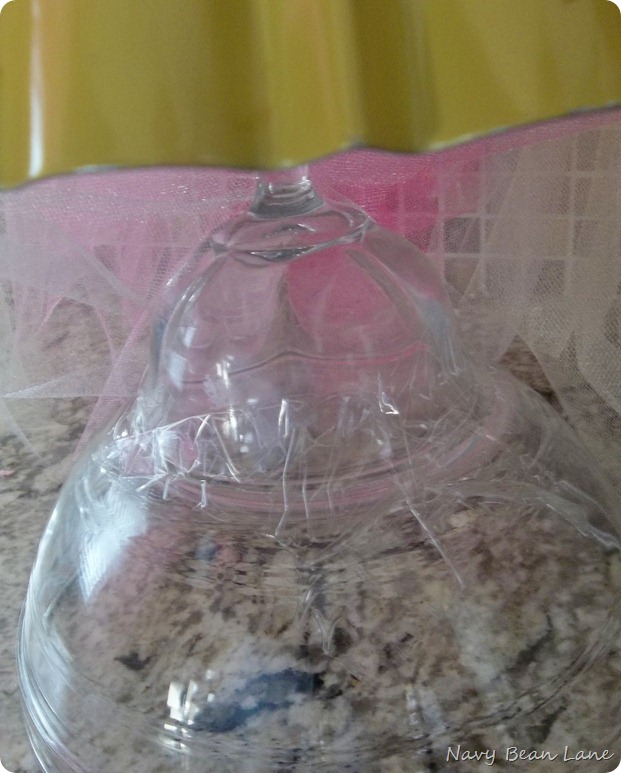
First, you will need a cake stand. Any old cake stand will do since it will be covered with tulle (and the cake). I wanted my cake to sit up a bit higher than it would by itself so I simply found a bowl and turned it upside down. Then I took the cake stand and taped it onto the bowl with clear packing tape.


100_0940


Then it’s time to attach the tulle. I used four different colors of tulle; a light and dark pink and a light and dark creamy yellow (1/2 yard of each color), so a total of 2 yards of tulle. If you want the skirt to be fuller, simply add more tulle!

Cut your tulle into about 10 inch wide strips. The length of your piece will depend on how tall your cake stand is. Just make sure it’s long enough to hang down and hide the cake stand. My initial length before folding it over was 19 inches.


100_0943


Then, fold the top of your piece over but not quite in half. I folded about 1/3 of the way down. You want to make another layer of tulle without having to cut another piece. Make sense?


100_0944


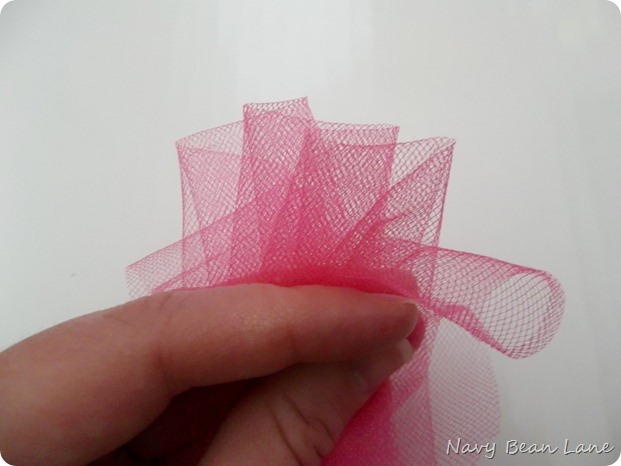
Then you will gather the top together with you fingers. You want your sections to be bunched together at the top … this will create the “skirt look”. If you skip this step it will just look like flat pieces of tulle hanging from your cake. No bueno!


100_0945


Once you have a section gathered, you simply tape it to the top edge of your cake stand. Then start over with a new piece of tulle and keep going around the cake stand until it is full. Make sure to slightly overlap each piece to keep your skirt nice and full!


100_0946


This is what the top of your cake stand will look like once you have finished taping all the tulle on. (FYI – I used strong packing tape to be sure that curious little fingers didn’t pull the skirt off while oohing and aahhing!)


100_0941


Once all the tulle is taped on and secure your skirt is done! Instead of putting the cake directly on the tape and tulle, I placed a round cardboard cake plate down and then the cake on top. You can find pre cut round cake boards at Wal–mart or JoAnn’s or most party stores. Or you can do like I did and cut one out of a piece of cardboard.

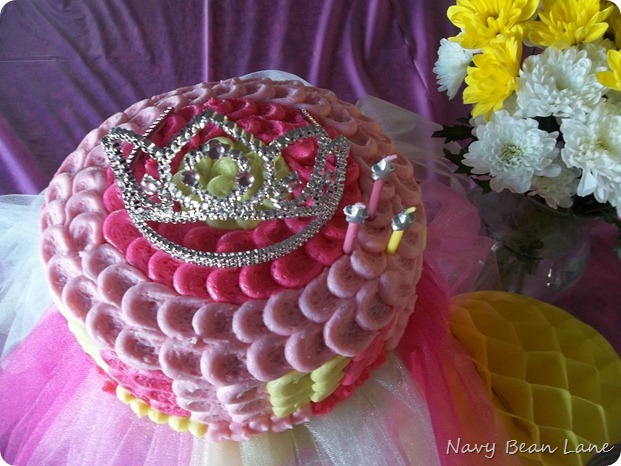
After frosting the cake I finished it off with a crown a few wand candles! This is for sure up there as one of my all time favorite cakes! So cute and easy!!


100_0917


100_0916


I thinks it’s safe to say that it was a hit with the princess! You can’t beat that smile!


100_0920


Now, go get your cake on!

Kristin


Linked up at:
Not Just a Housewife
Savvy Southern Style
Young House Love
Somewhat Simple
Tatertots & Jello,Six Sisters Stuff,Sassy Little Lady

Monday, February 25, 2013

Navi’s Three!


Today my baby turns three. I have found myself unexpectedly emotional. Probably because she IS and always will be our baby. She is our last and even though I feel like our family is complete I will always miss those first days, weeks, and months of my babies lives! I look back at her newborn pictures and wonder where the time has gone? Those days seem like a blur. I am so grateful for pictures to remind me of that sweet, innocent time.


IMG_5905 copy


One year old …

263


18 months …

IMG_1674


Two years old …

DSC02803


And now…three years old! She is all girl (for the most part) and I love it! Happy birthday to my beautiful, smart, loving, sassy princess!

2011-01-16 007


We had her party last night and what could more fitting for the little miss than a princess cake? She loved it and that’s all I can ask for!

100_0915


Here’s to having a great week!


Kristin

Friday, February 15, 2013

Featured at Involving Color Today!

Hey everyone! I am so so excited to tell you that we are being featured over at Involving Color today! (Insert happy dance here!) They are featuring the black bathroom cabinets that we painted and posted about here.


Doyle_16


I love this blog because she shows what a paint color looks like in a room, on a piece of furniture or like in our case on cabinets. It really gives you an idea of how a color will look before actually taking the plunge. And it’s organized so that you can search for a color by brand, color, or space. Go check it out and give her some love … you won’t regret it I promise!

Hope you all have a fabulous weekend …

Kristin

Thursday, February 14, 2013

Happy Love Day!


I just wanted to drop in this morning and wish everyone a

Happy Love Day!

This year I took the easy route and did store bought valentines for the kiddos which I am totally ok with. Sometimes I just can’t do it all! But I couldn’t leave you without ANY pictures so here are last years valentines. I just love these cute little munchkins of mine!


2011-09-11 0011


DSC02730


100_0092


[2011-09-11%2520001%255B8%255D.jpg]


Now I’m off to mug on my little miss while the boys party it up at school! Have a wonderful LOVE day!!!

Kristin

Thursday, February 7, 2013

Changing it Up … The Evolution of a Little Boys Room {Curtains}


If you follow me on Facebook, then you know that I’ve been working on the curtains for Mason’s room. It’s really quite a small change that makes a big difference in the look of the room.

If you are having a hard time remembering … here’s a look at what his room looked like before. Just remember it’s a work in progress :)

100_0768


This is how the room looks now. I moved the curtain rod up a good six inches to make the room feel a little taller. I’m not sure why I ever hung them any lower … maybe to fit the curtain panels as they were!? LAZY! Then I just added a band of gray and white chevron fabric to the bottom of each panel so that they went to the floor. I don’t know about you, but I am extremely anti high-water curtains, so this simple fix did the trick!


100_0880


I love having a new pattern introduced in the room. Even though it’s a small amount … and pretty neutral, it’s still a pattern, so I will go ahead and give myself a pat on the back for that! (If you know me you know I have a hard time adding in pattern … weird, I know.)


100_0884


Here’s another look at the progress on the other side of the room. I’m wanting to start on the desk area next (it will be in the empty space to the left of the closet). But first I have to decide whether I should do white or stained planking on the wall. What do you think? I have always pictured it stained, but am feeling like the room is getting a little dark with the dark bedding and curtains. What to do, what to do!


100_0883


Slowly but surely we are making progress. Here is a run down of what still needs to be done. I’m hoping to have it done by the end of the month so I can move onto something else … we shall see!!!

Mason’s Room

Paint

lengthen curtains

new dresser

memo wall

plank the desk wall

desk/chair

accessories

headboard

Trophy Organization

Desk Lighting

Art/Pictures on wall

*Bed skirt


Hope you all are having a great week!

Kristin


Linked Up:
Thrifty Décor Chick